Cedar is the only common residential roofing material where maintenance changes the outcome substantially. An asphalt shingle roof degrades on a schedule largely set at the factory; there is very little a homeowner can do to extend it. A cedar roof is different. The gap between a cedar roof that has been maintained and an identical cedar roof that has been ignored is measured in decades, not years – and the maintenance itself is not complicated or expensive.
The reason comes down to two mechanisms, and everything in this schedule serves one of them.
The Two Jobs of Cedar Roof Maintenance
Job one: keep the wood drying. Wood-decay fungi require free water inside the wood cells. Below approximately 20% moisture content, they cannot establish or sustain growth. The fiber saturation point sits around 28–30%, and between those figures fungal activity increases steadily in any temperature between roughly 40°F and 100°F.
A cedar roof in the Chicago area gets soaked dozens of times a year, and that is fine – cedar is chosen because it handles wetting. What it cannot handle is failing to get back below 20% before the next wetting event. Every debris-clearing, moss-removal, tree-trimming, and ventilation task in this article exists to protect that one threshold.
Job two: replace the protection the wood loses. Western red cedar heartwood contains natural fungicidal extractives, primarily thujaplicins, which is why cedar works as a roofing material without chemical treatment. Those extractives are water-soluble and finite. Decades of rain leach them out of the exposed surface layers, which is why decay problems on cedar roofs cluster heavily in the back half of the service life. Periodic preservative treatment restores protection the wood has already given up.
A homeowner who understands those two jobs can evaluate any maintenance recommendation they are given. If a proposed service does not help the roof dry or does not restore its fungicidal protection, it is not cedar roof maintenance.
The Master Schedule
| Task | Frequency | Who | Purpose |
| Clear debris from keyways, valleys, behind chimneys | 2× per year (spring, fall) | Homeowner or pro | Removes moisture reservoirs sitting against the wood |
| Clean gutters and downspouts | 2× per year, minimum | Homeowner or pro | Prevents standing water at the vulnerable lower courses |
| Ground-level visual inspection | 2× per year, plus after major storms | Homeowner | Catches missing, split, and lifted shakes early |
| Attic inspection | 1× per year | Homeowner | Earliest detection of moisture reaching the deck |
| Trim back overhanging limbs | As needed, check annually | Arborist | Restores sun and airflow; reduces debris load |
| Check and clear attic vents | 1× per year | Homeowner | Under-roof drying depends on it |
| Professional roof inspection | Every 2–3 years | Pro | Assesses what cannot be seen from the ground |
| Moss and algae treatment | As needed, typically every 2–4 years | Pro | Removes the primary cause of surface decay |
| Full cleaning and preservative treatment | Every 4–6 years, exposure-dependent | Pro | Restores fungicidal protection and water repellency |
| Flashing inspection | Every 5 years, and after any leak | Pro | Metal fails on its own timeline, not the wood’s |
| Individual shake replacement sweep | Every 8–12 years | Pro | Restores triple coverage before leaks start |
| Ventilation and assembly review | Every 10 years, or at first premature failure | Pro | Catches systemic problems while they are still correctable |
The rest of this article explains each of these — what it involves, why the interval is what it is, and where homeowners get it wrong.
Twice a Year: Debris, Gutters, and a Look
This is the highest-value maintenance on a cedar roof and the most commonly skipped. Two visits a year, spring and fall, prevent the majority of premature cedar roof failures we see.
Why Debris Is the Central Problem
A cedar roof sheds water through overlap and spacing. Shakes are laid with keyways between them — typically 3/8 to 5/8 of an inch — and those gaps are drainage channels, not defects. They are also exactly the right width to catch pine needles, oak leaves, maple seeds, and shingle grit blown from a neighboring roof.
Organic debris packed into a keyway does three things: it dams water so it sits against the wood instead of running off, it holds moisture long after the roof surface has dried, and it decomposes into a growing medium for moss. A keyway full of needles is a small permanent wet spot. Multiply that across a slope and the roof no longer returns below 20% moisture content between rain events.
The same applies with more force to valleys, the area behind chimneys, dormer intersections, and any place where debris naturally accumulates. These are also the areas where a cedar roof depends on metal flashing rather than overlap, and debris held against flashing accelerates corrosion.
How to Clear It Correctly
- Work downslope, never upslope. Blowing or brushing debris up the roof forces it under the butt ends of the shakes, which is worse than leaving it in place. Every stroke should move material toward the eave.
- Stay off the roof if you can. Cedar is slippery when damp, and a slope with existing decay may not hold weight. Most debris clearing on a residential cedar roof can be done from a ladder at the eave with a leaf blower and a soft brush.
- Use a soft brush, not a rake or scraper. Metal tools split shakes and lift them off their fasteners.
- Never pressure wash to clear debris. Covered in detail below — this single mistake removes years from a cedar roof.
Gutters
Clogged gutters back water up onto the lowest courses of the roof, which are already the most vulnerable part of the assembly — they carry the total runoff of every slope above them. In winter, a clogged gutter is also the starting point for an ice dam.
Clear gutters and downspouts at both visits, and while you are at the eave, look at what came out. Fine cedar grit and small fibers are normal surface erosion and appear in the gutters of every healthy cedar roof. Large quantities of soft, punky material, or fragments that crumble between your fingers, mean shakes are shedding structure rather than surface — which is a different conversation, covered in our guide to distinguishing cedar rot from normal weathering.
The Ground-Level Visual
From the driveway with binoculars, looking at each slope in turn:
- Missing shakes, or gaps where a shake has slipped
- Shakes split through their full width
- Butts lifted high enough to expose the keyway below
- Isolated dark patches within an otherwise uniformly gray plane
- Green moss growth, especially on north slopes and under tree cover
- Sagging or wavy lines in the roof plane, which suggest deck problems
- Debris accumulation you cannot see from the eave
Uniform gray across a slope is normal and expected. Tonal differences between slopes are also normal — south and west faces gray fastest, north faces stay darker and blotchier because they hold moisture longer. What you are looking for is anything isolated, anything asymmetrical within a single plane, and anything green.
Fall: The Visit That Matters More
If you only do one seasonal visit, do the fall one, and do it after leaf drop is essentially complete but before the first hard freeze.
- Clear all debris and gutters. Anything left in a keyway going into winter stays wet for months under snow cover, at temperatures that are frequently within fungal activity range during thaws.
- Check the attic ventilation path. Blocked soffit intake vents — often blocked by insulation pushed into the eaves — are the primary cause of ice dams. Under-roof airflow is what keeps the deck cold enough that snow does not melt and refreeze at the eave.
- Look at insulation depth and air sealing. Ice dams are a heat problem, not a roof problem. Warm air leaking into the attic melts snow that then refreezes at the cold eave and holds standing meltwater on the lowest courses for weeks.
- Confirm downspouts discharge away from the foundation and are not going to freeze solid at grade.
- Trim any limbs that will load with ice. An ice-loaded branch resting on a cedar roof abrades shakes and can break them.
Winter: Mostly Leave It Alone
Cedar roofs do not need winter maintenance. They need to be left undamaged.
- Do not chip or pry ice. Metal tools on cedar in freezing conditions split shakes reliably. If an ice dam has formed and water is entering the house, the correct response is steam removal by a professional, not a hammer.
- Do not use ice melt, rock salt, or chloride-based products on a cedar roof. Chlorides degrade wood and corrode fasteners, and the fasteners are the thing holding every shake on the roof.
- Do not use a metal snow shovel or a roof rake with a hard edge on cedar. If snow load genuinely needs reducing, that is a job for someone who works on wood roofs.
- Do watch the interior. Winter is when leaks announce themselves. New staining on an upstairs ceiling, or icicles forming behind the gutter line rather than at the edge, are both worth acting on.
Spring: Damage Assessment
The spring visit is a damage check as much as a cleaning.
- Clear the winter’s accumulated debris and re-clear gutters
- Count and locate any shakes lost over the winter — freeze-thaw cycling splits shakes, and split shakes blow off in spring wind
- Look specifically at the lowest two or three courses above each gutter run, which is where ice dams do their damage
- Check for moss, which does most of its growing in cool damp conditions and is at its most visible in spring
- Inspect visible flashing at valleys, chimneys, skylights, and sidewalls for displacement or corrosion
- Do the annual attic inspection now, when winter’s moisture problems have left evidence but before summer heat dries the traces
The Annual Attic Inspection
Fifteen minutes, a bright day, a strong flashlight, and every other light off. This is the earliest warning system a cedar roof has, and it costs nothing.
- Daylight through the deck anywhere other than intentional vents
- Dark tide lines or staining on the underside of the sheathing, concentrated near valleys, chimneys, skylights, and eaves
- Sheathing that gives when probed with a screwdriver — the deck should be firm everywhere you can reach
- Mold on rafters or sheathing — black, gray, or white patching
- A musty, earthy, mushroom-like smell, which is often detectable before anything is visible
- Matted or damp insulation, indicating water has been arriving for some time
- Blocked soffit vents, and whether the ridge or upper vents are clear
Summer: Watch the Growth
Summer humidity in the region regularly sits high enough to slow evaporative drying, and proximity to Lake Michigan extends the periods when surfaces stay damp. This is the season when moss and algae established in spring do their real damage, and when UV exposure is at its peak on south and west slopes.
Nothing here requires action every year, but summer is the right time to schedule cleaning and treatment work, because the wood needs to be dry when a preservative is applied and it needs several dry days afterward to cure.
Every 2–3 Years: Professional Inspection
A ground-level visual catches missing shakes and obvious problems. It does not catch the things that determine how long the roof lasts.
More than half of every shake’s length is permanently hidden beneath the course above it — an 18-inch shake is typically laid at 7.5 inches of exposure, a 24-inch shake at 10 inches. The visible portion of every shake on your roof is the part most likely to still be sound. A professional inspection probes the wood for hardness, checks fastener condition, evaluates flashing at every penetration, assesses keyway spacing and coverage, and looks at the deck from below.
Every two to three years is the right interval for a cedar roof in good condition. Annually is reasonable once a roof is in the back third of its life, or on a heavily wooded lot. For how service life actually accumulates on cedar, see our breakdown of cedar roof life expectancy.
Every 2–4 Years: Moss and Algae Treatment
Moss does not eat wood. What it does is hold water against the surface continuously, keeping the wood above the moisture threshold at which decay fungi become active, while its root-like structures work into checks and keyways and widen them. Moss is best understood as a decay incubator: on its own it is cosmetic, but left in place for several seasons on a shaded slope it reliably produces the real thing underneath.
Black streaking and dark blotching, by contrast, is usually surface mildew and algae growing on top of hard wood. The distinguishing test is your thumbnail: mildew sits on a firm surface, decay softens the wood itself.
The interval depends almost entirely on exposure. An open, sunny lot may go a decade without meaningful growth. A north slope under a mature oak canopy may need attention every other year.
Every 4–6 Years: Cleaning and Preservative Treatment
This is the core professional service on a cedar roof, and the one that most directly extends its life.
Cleaning: Why Pressure Washing Is the Wrong Answer
Pressure washing a cedar roof is the single most damaging thing commonly done to one. It:
- Strips the surface fibers. Weathered cedar’s outer layer is already photodegraded and mechanically loose. High-pressure water removes it wholesale, taking sound wood with it and leaving a raised, fuzzy surface that absorbs and holds more water than it did before.
- Drives water up under the courses. A cedar roof is designed to shed water flowing downslope. Pressurized water directed at or under the butt ends goes exactly where the assembly has no defense, soaking the covered portion of every shake and the interlayment between courses.
- Erodes the keyways and softens the wood around the fasteners, which is what causes shakes to loosen and slip in the years after a wash.
The correct approach is low-pressure application of an appropriate wood cleaner, dwell time, gentle agitation where needed, and a low-pressure rinse. The chemistry matters too: heavy chlorine-based mixes clean effectively but are aggressive on lignin, corrosive to fasteners and metal flashing, and damaging to the plantings below. Oxygen-based and purpose-formulated wood cleaners are gentler on the wood and on everything around it, which is why we use water-based, low-odor, environmentally responsible products on cedar rather than the harshest thing that works.
Treatment: What It Does and What It Cannot Do
The functional part of a cedar roof treatment is a water-repellent preservative — a water repellent to reduce how much moisture the wood takes on, plus a fungicide or mildewcide to restore the fungicidal protection the wood has leached out over the years. That combination is directly aimed at both jobs described at the top of this article, which is why it works.
What matters when choosing:
- Penetrating, not film-forming. This is the critical distinction. A cedar shake must be able to dry from both faces, and it must be able to move seasonally with moisture change. A penetrating preservative soaks into the wood and leaves the surface breathable. A film-forming coating — paint, solid stain, or a sealer — traps moisture inside the shake, blocks drying, and then peels as the wood moves beneath it. Sealing a cedar roof is not maintenance; it is a way to shorten its life.
- Reapplication is exposure-driven, not calendar-driven. South and west slopes lose treatment fastest to UV; shaded slopes hold it longer but need the fungicide more. Four to six years is the general window, but the roof tells you: when water stops beading and starts darkening the wood on contact, the repellent has depleted.
- Timing. The wood must be dry when treated and needs dry weather afterward. Late spring through early fall is the working window in this climate.
- Fire-retardant treatment is not a field service. Fire-treated shakes are pressure-impregnated at the mill. If fire rating matters for your property, it is a material specification made at installation, not something applied to an existing roof.
Flashing, at the Same Visit
Metal fails on its own schedule, independent of the wood. Every five years, and after any leak, the flashing at valleys, chimneys, skylights, sidewalls, and vent penetrations should be assessed.
Galvanized flashing corrodes, and because it all went on the same day, it tends to reach end of life everywhere at once. Copper and zinc outlast the cedar above them, which means they never need to be revisited — and zinc runoff suppresses moss growth on the courses immediately below it, which is a genuine maintenance advantage on a shaded roof. When flashing is being replaced anyway, upgrading the metal is the cheapest life-extension available on a cedar roof.
Every 8–12 Years: The Shake Replacement Sweep
Individual shakes fail — split through, blow off, crack at the fastener — long before the roof as a whole does. Left alone, each one reduces the roof’s coverage at that point and starts a localized wet spot.
A cedar roof relies on triple coverage: three layers of wood over every point of the deck, achieved through exposure that is less than a third of the shake length, with keyways offset course to course so no gap aligns with the gap above it. Every missing or split-through shake is a hole in that system.
Once a decade, a systematic sweep — replacing every failed shake across every slope rather than only the ones causing visible problems — restores the coverage the roof was built with. Done on schedule this is inexpensive routine work. Deferred until leaks appear, it becomes a repair-versus-replacement conversation, which we cover in detail in our guide to when a cedar roof is past repair.
Every 10 Years: Review the Assembly Itself
Some things are not maintenance items but design conditions, and they are worth verifying once a decade because they determine whether all the other maintenance is working.
Under-Shake Ventilation
A cedar shake dries from both faces. Cedar was historically laid over spaced or “skip” sheathing precisely so air could reach the underside. On a modern solid deck, that air space has to be created deliberately — a ventilating mat such as Cedar Breather between the underlayment and the shakes.
Without it, the back of every shake sits against a surface that cannot breathe, and moisture that gets in stays above the decay threshold indefinitely. The roof then deteriorates from the hidden face while the visible surface still looks acceptable. If a cedar roof is failing well short of its expected life despite good maintenance, this is the first thing to check. You can see how the detail is executed on our installations in the project gallery.
Attic Ventilation
The standard target is one square foot of net free ventilating area per 300 square feet of attic floor area, split roughly evenly between low intake at the soffits and high exhaust at or near the ridge. Balance is the part that gets missed: ridge vents with blocked soffit intake do not ventilate, they just depressurize the attic and pull conditioned air out of the house.
Under-roof ventilation is what keeps a cedar deck dry from below and what prevents ice dams from forming above.
Tree Clearance
Aim for six to ten feet of clearance between the roof surface and overhanging limbs. That distance restores direct sun and air movement to the slope, cuts the debris load in the keyways substantially, and removes the abrasion risk from ice-loaded branches.
This is the highest-impact maintenance decision available on shaded properties, and it is why cedar roofs in the wooded older neighborhoods of Winnetka, Glencoe, Lake Forest, and Hinsdale so often need work on their north and east slopes decades before the south slope shows anything. Confirm any significant tree work against local tree ordinances first — several North Shore villages regulate removal and major pruning of mature trees.
Fasteners
Cedar shakes should be held by corrosion-resistant nails — stainless steel, or at minimum hot-dipped galvanized — two per shake, set roughly three-quarters of an inch in from each edge and just above the exposure line. Rust staining around fastener locations, or shakes slipping without any visible damage to the wood, indicates fastener corrosion. That is not a maintenance item; it is a condition affecting every shake on the roof, and it belongs in the replacement conversation.
The Short List of Things Not to Do
- Do not pressure wash. The most common and most damaging mistake.
- Do not seal, paint, or apply a solid-color coating. Film-forming finishes trap moisture and block the two-sided drying cedar requires.
- Do not walk on the roof unnecessarily, and never on a damp one or one with suspected decay. Cedar breaks under concentrated load and a soft deck will not hold you.
- Do not blow or brush debris upslope. It forces material under the shake butts.
- Do not use chlorides, rock salt, or ice melt on or above a cedar roof.
- Do not chip ice with metal tools.
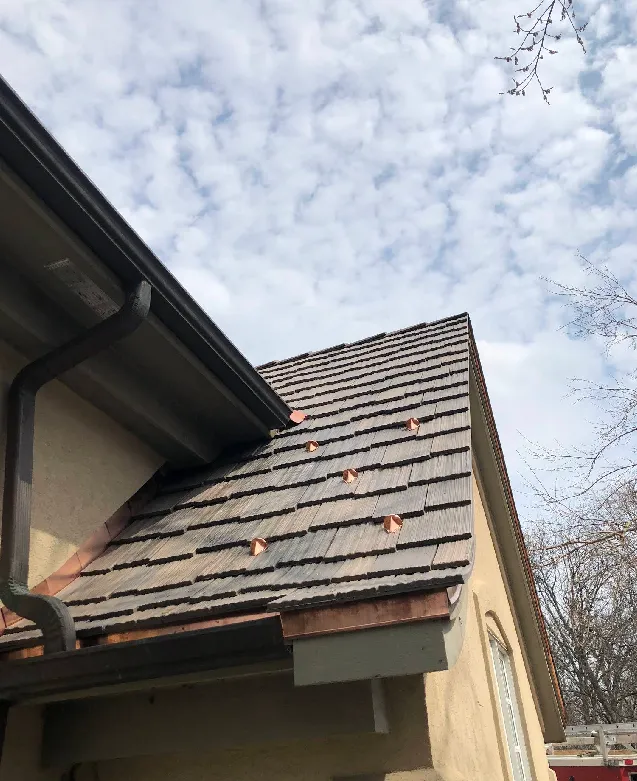
- Do not install zinc or copper strips with self-adhesive backing over the shakes as a moss fix. Fasten metal properly or use flashing upgrades; adhesive strips trap water and lift.
- Do not defer debris clearing on a wooded lot. One skipped fall is not a disaster. Five skipped falls is a north slope that needs replacing.
Keep a Record
Write down what was done and when: cleaning dates, treatment dates and products, shakes replaced, flashing work, inspection findings. Two reasons this matters more than it sounds.
First, it converts guesswork into a schedule — treatment intervals on cedar are exposure-driven, and the only way to learn your roof’s actual interval is to track it.
Second, it is worth real money at two moments: when a buyer’s inspector looks at a cedar roof during a sale, and when a storm-damage insurance claim depends on demonstrating that the roof was maintained rather than neglected. A documented maintenance history on a cedar roof is an asset, and on the North Shore market specifically it removes one of the standard buyer objections to wood roofing.
Get on a Schedule Instead of Waiting for a Leak
Nearly every cedar roof we replace early could have gone longer. The failures are rarely dramatic — a wooded lot where nobody cleared the keyways, a shaded slope where moss sat for six years, a roof that was never treated after its extractives leached out, blocked soffit vents nobody knew about.
All Roofs Cedar Shake works exclusively on cedar and shake roofing across Chicago and the surrounding suburbs, including Winnetka, Wilmette, Glencoe, Highland Park, Northbrook, Glenview, Lake Forest, Barrington, Hinsdale, Oak Park, and Naperville. We clean and treat cedar with water-based, environmentally responsible products, replace failed shakes, upgrade flashing to copper or zinc, and correct the ventilation problems that cause premature failure in the first place.
Call (224) 432-6887 or request a free inspection online. Licensed cedar roofing specialists, Roofing License 104.031891, based at 874 Green Bay Rd, Winnetka, IL.
Frequently Asked Questions
How often should a cedar shake roof be cleaned and treated? Cleaning and preservative treatment every four to six years suits most cedar roofs, but the interval is driven by exposure rather than the calendar. Sunny, open slopes lose water repellency faster to UV; shaded and wooded slopes need the fungicide component more often. A practical indicator is water behavior: when rain stops beading and begins darkening the wood on contact, the repellent has depleted.
Can I pressure wash my cedar roof? No. Pressure washing strips the surface fibers, drives water up under the courses into the covered portion of every shake, and erodes the wood around the fasteners so shakes loosen afterward. Cedar requires low-pressure cleaning with an appropriate wood cleaner. This is the most common way homeowners unintentionally shorten a cedar roof’s life.
Should a cedar roof be sealed? Not with a film-forming product. Cedar shakes must dry from both faces and move seasonally with moisture change, and paint, solid stain, or a surface sealer traps moisture inside the wood and then peels. The correct product is a penetrating water-repellent preservative that leaves the surface breathable.
How do I get moss off a cedar roof? With a low-pressure treatment applied by someone who works on wood roofs, never with a pressure washer or a scraper. Moss does not consume the wood, but it holds moisture against the surface and keeps it above the moisture content at which decay fungi become active, so it should not be left in place for multiple seasons. Longer term, reducing shade and debris by trimming back overhanging limbs addresses the cause rather than the symptom.
Do cedar roofs need more maintenance than asphalt shingles? Yes, and the maintenance produces a much larger return. An asphalt roof degrades on a schedule that a homeowner can do little to change. A cedar roof’s service life varies enormously with how it is kept, which means the twice-yearly debris clearing and the periodic clean-and-treat cycle genuinely buy years.
What is the most important cedar roof maintenance task? Clearing debris out of the keyways, valleys, and gutters twice a year. Organic material packed into the gaps between shakes holds moisture directly against the wood, keeps it above the decay threshold between rain events, and decomposes into a growing medium for moss. On a wooded lot it is the difference between a roof that reaches its expected life and one that does not.
When should a professional inspect a cedar roof? Every two to three years for a roof in good condition, annually once it enters the back third of its service life or on a heavily wooded property, and after any significant hail or wind event. More than half of each shake’s length is hidden beneath the course above it, so a ground-level look cannot assess the condition that matters.